Please initiate the migration process on a testing server initially. Following a thorough evaluation, if the system operates satisfactorily on the testing server, proceed with the upgrade on the production server
Step 1: Install a Fresh Copy of DSpace on a New Server
Click here for installation instructions for DSpace 8.1
On your new server, follow the installation guide and set up a fresh (empty) instance of the 8.1 version of DSpace. Before proceeding further, ensure that the installation is successful and the site starts up without any errors.(Note: It is completely normal for the site to appear empty at this stage.)
Step 2: Prepare your data to copy from the old DSpace7.x to DSpace8.1 or 9.x
There are three main areas of data you need to migrate in order to ensure no data loss. please follow the steps
Perform these steps on the old server
First, you should STOP tomcat on the old server. These steps require the site to be down. you need to Stop the version of tomcat that you are using (tomcat9/10)systemctl stop tomcat9
Update sequences (optional) – When migrating content, sometimes sites will find that database sequences will be outdated or incorrect. This can result in “duplicate key” errors during the database migration to the latest version. To avoid this, before you export your data, run this older copy of the “update-sequences” command on your database. This should ensure your database sequences are updated before you dump your data.
for that first find the location of the update-sequences.sql
find / -name update-sequences.sql
the above command will return the path of the update-sequences.sql file in your server

Which One to Use?
Both files contain the same SQL script, but:
Use the source one (src/main/resources/…) if you’re making modifications or exploring DSpace internals.
Use the compiled one (target/classes/…) if you’re scripting or running after build.
in my case am using the compiled one (target/classes/…)
In the next line replace the path marked in red colour with yours and execute the bellow command with your path . befor executing switch to dspace user (if password is asked then type your dspace password
su dspacepsql -U dspace -f /home/dspace/DSpace-dspace-7.6.1/dspace-api/target/classes/org/dspace/storage/rdbms/sqlmigration/postgres/update-sequences.sql dspace
after executing the above command sometimes it may ask for a password enter your dspace database password
The database data – Make sure to export the database data from your old DSpace site using a tool like “pg_dump” (for PostgresSQL). Execute the bellow command to take the database backup. Replace the path marked in red with your actual path where you want the backup
Switch to root user
su root
then execute the bellow command
mkdir /mnt/Anoop
chown -R dspace:dspace /mnt/Anoop/
now switch to dspace user
su dspacepg_dump -U dspace dspace > /mnt/Anoop/dspace.sql
now switch to root user
su root
The “assetstore” folder – This folder is in your DSpace installation directory and it contains all the files stored in your DSpace. You will need all the contents of this folder (including all subdirectories), so you could choose to zip it up.
apt install zip unzip -ycd /dspace
Steps to Take Backup of assetstore folder to your backup directory. Replace the path marked in red with your actual path where you want the backup. the command may take 20 to 30 minutes to complete according to your assets sizezip -r /mnt/Anoop/assetstore.zip assetstore/
The Solr data (optional) – Both DSpace authority and statistics are stored in Solr. If you want to keep these, you will want to export them from the old Solr and move them over. Use the “solr-export-statistics” tool provided with DSpace. Replace the path marked in red with your actual path where you want the backup
/dspace/bin/dspace solr-export-statistics -i authority/dspace/bin/dspace solr-export-statistics -i statistics
The dumps will be written to the directory /dspace/solr-export. This may take a long time and require quite a lot of storage. In particular, the statistics core is likely to be huge, perhaps double the size of the content of solr/statistics/data. You should ensure that you have sufficient free storage.cd /dspacezip -r /mnt/Anoop/solr-export.zip solr-export/
Step 3: Copy over the prepared data and import it into the new DSpace
Copy the data you’ve prepared in Step 2 over to the new server using USB/Network/Internet/etc in my case copy all folders ,sub folders and files under /mnt/Anoop directory to the new serverunder the pat h /mnt/Anoop
Step 4: Now, you’ll import this data into your new installation of DSpace (created in Step 1).
Perform these steps on the New Server
First, you need to STOP tomcat . These steps require the site to be down.change the tomcat version number as per your system. in my new server it is tomcat10systemctl stop tomcat10
Stop and Start Postgresql – This will terminiate existing connection to postgresqlsudo systemctl stop postgresqlsudo systemctl start postgresql
Delete the existing databasesudo -u postgres psqlDROP DATABASE dspace;\q
Create New Database
Open a New Terminal and login as Postgres Usersu postgres
in my case it is postgres 15. according to yours you have to do the bello step cd /etc/postgresql/15/main
Now we are going to create a Database named dspace and going to make the dspace user which we have created during fresh installation as the owner for dspace db
createdb --username=postgres --owner=dspace --encoding=UNICODE dspace
Enable PgCrypto Extensionpsql dspace -c "CREATE EXTENSION pgcrypto;"
Apply the following command to exit from postgres user.exit
Now make sure you have copied Database , Asset Store and other files and folders mentioned earlier to your new server (in my case I have copied all those from my old server to my new server and they were kept in a folder named /mnt/Anoop in the root directory
Switch to that directory in the new server were the backups are copied su rootcd /mnt/Anoop
now list the files in that folder and make sure your database, AssetStore and the solr-export are available in that pathls

Switch to postgres unix usersu postgres
Restore the DB copied from old server to the new database created in new serverpsql -U postgres dspace < dspace.sql
The “assetstore” folder – Delete the empty assetstore folder on the new server.
switch to root privileged user in linux (in my case root is the super user)su rootsudo rm -rf /dspace/assetstore
Extract the entire assestore folder (and all subdirectories) from the file copied from old server to the dspace directory in the new server
In my case I have zipped the folder as assetstore.zip and copied it in the new server under the directory named Old_Server under root directory
cd /mnt/Anoopls
UnZip the assetstore.zip fileunzip assetstore.zip
move the asset store to the default dspace pathsudo mv assetstore /dspace
Provide tomcat Permission to the New asset store folder we have createdsudo chown -R tomcat:tomcat /dspace/assetstore/
The “solr-export” folder – Delete the empty solr-export folder on the new server.
switch to root privileged user in linux (in my case root is the super user)su rootsudo rm -rf /dspace/solr-export
Extract the entire solr-export folder (and all subdirectories) from the file copied from old server to the dspace directory in the new server
In my case I have zipped the folder as solr-export.zip and copied it in the new server under the directory named /mnt/Anoop under root directory
UnZip the solr-export.zip file to the same directoryunzip solr-export.zip
move the solr-export to the default dspace pathsudo mv solr-export /dspace
Provide Necessary Permission to the New Foldersudo chown -R tomcat:tomcat /dspace/solr-export/
now import the solr-statstics/dspace/bin/dspace solr-import-statistics -i statistics
/dspace/bin/dspace solr-import-statistics -i authority
Step 5: Update the database, Start DSpace & Reindex
In this stage we need to ensure that the data in Database are reindexed properly (for the new version of DSpace).
Perform these steps on the New Server
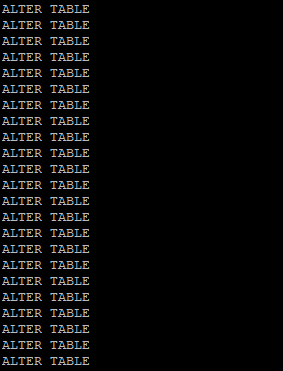
Migrate/Upgrade the database to the latest version – Now that your old data is migrated, you MUST ensure it’s using the latest database updates based on the new DSpace you’ve . switch to root previlage user in my case root is the super usersu rootcd /dspace/bin/./dspace database migrate ignored

Steps to fix the Wrong URI Showing at the Item Page (This Step is purly optional you have to do only if you were migrating from Dspace 6 to 7 or 8 or 9 or your dspace hosting URL Changed ) others may skip this step and do the Content Reindexing step
After the Dspace Upgrade when you open the item page of a item in our new domain you can see a URI link on the page and which is showing wrong URIs / old URI (Example Pictures are given Bellow)

dc.identifier.uri is a metadata field. So, it doesn’t automatically change values if you change dspace.ui.url. or if you upgrade from dspace 6.X to 7.X You’d have to update the value of dc.identifier.uri in bulk using a database query
Follow the steps to fix the issue, and note that the bellow queries may work only if you followed my Installation and updation /Upgradation readme
Now we are going to replace the old URL with our new URL using the Database Query
In my case https://anoop.kila.ac.in is my new URL which I have mentioned in red color in the bellow query. you may replace it with your actual URL and execute it in your postgres console
Switch to postgres consolesudo -u postgres psql -d dspace
It Will open the postgres console. now copy the bellow lines totally and paste it on the console. Don’t forgot to change your Web URL / Ip address Marked in Red with yours and don’t forgot to change whether it is http or https url according to your installation
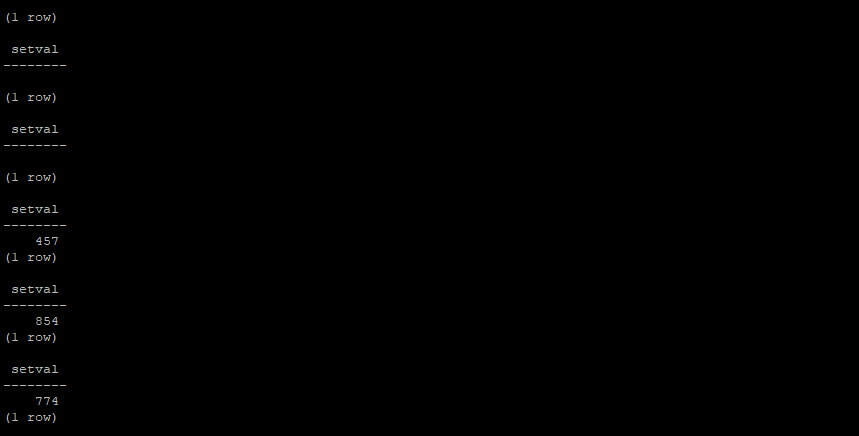
WITH prefix_cte AS (
SELECT 'https://anoop.kila.ac.in' AS prefix
)
UPDATE metadatavalue
SET text_value = CONCAT(
(SELECT prefix FROM prefix_cte), '/handle/',
REVERSE(SUBSTRING(REVERSE(text_value) FROM '[^/]+/[^/]+'))
)
WHERE text_value LIKE '%http%' OR text_value LIKE '%https%';
You will get an output similar to this according to the number of items in your repository
Now exit from postgres consoleexit
Reindex all content – This will ensure all search/browse functionality works in the DSpace site. Optionally, if you use OAI-PMH, you will want to reindex content into there as well.
cd /dspace/bin/./dspace index-discovery -f./dspace oai import -c
Site Map Generation
cd /dspace/bin
./dspace generate-sitemaps
Filal Step Before Starting tomcat (Optional)
Review your customized configurations (recommended to be in local.cfg): With any major upgrade some configurations may have changed. Therefore, it is recommended to review all configuration changes that exist in the /dspace/config directory, and its subdirectories, concentrating on configurations your previously customized in your old dspace local.cfg.
Major Path to Verify the backend Configuration is listed bellow.Make sure the server configurations, database configurations and the email configurations are correct
sudo nano /dspace/config/local.cfg
If Everything found correct the restart the tomcat to access dspace
Restart tomcat – in my case in is tomcat10systemctl restart tomcat10
Now browse your dspace url and test all the bitstreams are available and working fine in the new web site
https://your-website-address/


Hi!
Thanks for sharing your work!
I have a dspace 8.0 with a completely modified UI, including photos, CSS, homepage text, etc.
The process you describe works for me, but how can I migrate the front-end content from dspace 8.0 to 8.2 without having to rework it in 8.2?
Thanks!
Hi!
Thanks for the update. To guide you properly, could you please share more details about the changes you made — such as which files were modified (e.g., HTML, CSS, templates, or configuration files) and what specific customizations were done?
When original files in DSpace are directly modified, those edits usually need to be redone after every upgrade. It’s generally better to implement customizations through templating or theme extension so that future updates won’t overwrite your changes.
Hello!
Thank you for your response! I’ve modified some of the front-end files to display data specific to our institution, adding some photos and modifying the footer. There’s nothing more complex than that, and these files also exist in DSpace 9. I want to maintain the same look and feel I have in DSpace 8, but in the new DSpace 9 installation, without having to redo everything.
Thank you very much!
Hello,
Thank you for the clarification.
If your changes are mainly limited to front-end files such as custom text, images, footer changes, CSS, and a few UI-level template adjustments, then in most cases you do not need to rebuild everything from scratch in DSpace 9.
Since those files also exist in DSpace 9, the practical approach is to:
Identify all the files you modified in your DSpace 8 installation.
Compare them with the corresponding files in DSpace 9.
Reapply only your custom changes carefully into the DSpace 9 versions of those files.
Copy your custom assets such as images, logos, and related static files.
Test the homepage, footer, styling, and any institution-specific display sections after rebuilding the UI.
A direct full overwrite from DSpace 8 to DSpace 9 is not recommended, because some files may have changed internally between versions. It is safer to merge your customizations into the newer DSpace 9 files rather than replacing them entirely.
If your modifications were done cleanly and are not deeply structural, the migration effort should be much smaller than doing the whole design again from the beginning.
For future upgrades, it is always better to keep local customizations organized separately as much as possible, so that version-to-version migration becomes easier.