DSpace 10.x System Requirements
- Operating System: Debian 13 (Trixie)
- Java Development Kit (JDK): OpenJDK 21
- Apache Maven: Version 3.9.x or later (Java build tool)
- Apache Ant: Version 1.10.x or later (Java build tool)
- Relational Database (PostgreSQL):
- PostgreSQL 15.x, 16.x, or 17.x (with pgcrypto extension enabled)
- Apache Solr: Version 9.x (full-text indexing and search service)
- For Solr 9.8 or later, set solr.config.lib.enabled=true.
- Servlet Engine: Apache Tomcat 10.1.x
- Node.js: Version 20.19+, 22.x, or 24.x (preferably an LTS version)
DSpace 10.x consists of a Java-based backend and an Angular-based frontend. Both components need to be installed and configured independently.
Installation Steps
Update the Debian 13 Repository
Create a Copy of the Existing source File
cp /etc/apt/sources.list /etc/apt/sources.list.bak
Replace the source list with required repository
cat > /etc/apt/sources.list <<'EOF'
# Debian 13 Trixie - Main Repository
deb https://deb.debian.org/debian/ trixie main contrib non-free non-free-firmware
# Debian 13 Trixie - Stable Updates
deb https://deb.debian.org/debian/ trixie-updates main contrib non-free non-free-firmware
# Debian 13 Trixie - Security Updates
deb https://security.debian.org/debian-security/ trixie-security main contrib non-free non-free-firmware
EOF
System Update and Upgrade
sudo apt update && sudo apt upgrade -y
apt full-upgrade -y
Install common utilities.
apt install -y curl wget git tar unzip ca-certificates gnupg build-essential jq nano
Install Java 21, Maven, and Ant
Install Java Development Kit and Ant.
apt install -y openjdk-21-jdk ant
Install Maven.
apt install -y maven
Check Java version.
java -version
Check: It must show version 21.
Check the Java compiler.
javac -version
Check: It must show 21.
Check Maven and Ant.
mvn -version
ant -version
Check: Maven must be at least 3.9.x. If Debian installed an older Maven, install a supported 3.9+ version from Apache before proceeding.
Add Java Environment Variable
Find the Java installation directory
readlink -f $(which javac)
The expected output on Debian 13 is similar to: /usr/lib/jvm/java-21-openjdk-amd64/bin/javac
in that case Your JAVA_HOME is therefore: /usr/lib/jvm/java-21-openjdk-amd64
Notice that JAVA_HOME must point to the JDK directory, not to /bin/javac
Step 3. Configure JAVA_HOME system-wide
sudo nano /etc/environment
Add the following line in the file opened:
JAVA_HOME="/usr/lib/jvm/java-21-openjdk-amd64"
JAVA_OPTS="-Xmx2048M -Xms1024M -Dfile.encoding=UTF-8"
Save using Ctrl + O, Enter, then Ctrl + X.
Apply the setting to your current terminal
export JAVA_HOME=/usr/lib/jvm/java-21-openjdk-amd64
export PATH="$JAVA_HOME/bin:$PATH"
These commands apply immediately to the current terminal session.
Verify JAVA_HOME
echo $JAVA_HOME
Expected
/usr/lib/jvm/java-21-openjdk-amd64
$JAVA_HOME/bin/javac -version
Expected
javac 21.x.x
Also verify:
mvn -version
Maven should report that it is using Java 21.
Make JAVA_HOME available to your shell permanently
If you are working as the root user, open:
nano ~/.bashrc
Add these two lines at the bottom:
# Java 21 Environment Configuration
export JAVA_HOME=/usr/lib/jvm/java-21-openjdk-amd64
export PATH="$JAVA_HOME/bin:$PATH"
# Java Memory Configuration
export JAVA_OPTS="-Xmx2048M -Xms1024M -Dfile.encoding=UTF-8"
# Maven Memory Configuration
export MAVEN_OPTS="-Xmx2048M -Xms1024M -Dfile.encoding=UTF-8"
# Apache Ant Memory Configuration
export ANT_OPTS="-Xmx2048M -Xms1024M -Dfile.encoding=UTF-8"
Save and execute:
source ~/.bashrc
This makes the configuration available in future interactive Bash sessions for that user.
Prepare a dedicated application account
Create the user
useradd --system --create-home --home-dir /home/dspace --shell /bin/bash dspace
If you run DSpace installation commands as the dspace user, that account must also receive the appropriate Java environment. The root user’s .bashrc does not configure other accounts.
su - dspace
Open the dspace user’s .bashrc
nano ~/.bashrc
Add the following lines at the bottom:
# Java 21 Environment Configuration
export JAVA_HOME=/usr/lib/jvm/java-21-openjdk-amd64
export PATH="$JAVA_HOME/bin:$PATH"
# Java Memory Configuration
export JAVA_OPTS="-Xmx2048M -Xms1024M -Dfile.encoding=UTF-8"
# Maven Memory Configuration
export MAVEN_OPTS="-Xmx2048M -Xms1024M -Dfile.encoding=UTF-8"
# Apache Ant Memory Configuration
export ANT_OPTS="-Xmx2048M -Xms1024M -Dfile.encoding=UTF-8"
Save and execute:
source ~/.bashrc
now exit back to the root user
exit
su root
Create installation directories one by one.
mkdir -p /dspace
Create a directory for source code.
mkdir -p /opt/dspace-src
Create a directory for the deployed UI
mkdir -p /opt/dspace-ui
Assign ownership.
chown dspace:dspace /dspace /opt/dspace-src /opt/dspace-ui
Verify ownership.
ls -ld /dspace /opt/dspace-src /opt/dspace-ui
Check: All three should belong to dspace:dspace.
Install PostgreSQL and create a new DSpace database
Install PostgreSQL
apt install -y postgresql postgresql-contrib
Enable and start the database service.
systemctl enable --now postgresql
Check the installed PostgreSQL version.
sudo -u postgres psql -c "SHOW server_version;"
Check: The supported DSpace 10 versions are PostgreSQL 15, 16 and 17. Debian 13 normally uses 17.
Create the DSpace PostgreSQL role using an interactive password prompt.
sudo -u postgres createuser --pwprompt --no-superuser --no-createdb --no-createrole dspace
Check: Enter your chosen password twice and keep it secure.
Create the database and assign ownership to dspace.
sudo -u postgres createdb --owner=dspace --encoding=UTF8 dspace
Verify the database exists.
sudo -u postgres psql -c "\l dspace"
Test the database connection over TCP.
psql -h 127.0.0.1 -U dspace -d dspace -c "SELECT current_database(), current_user;"
Check: Enter the role password. Output should include dspace for both fields
If role/database already exists, do not recreate it. Inspect with sudo -u postgres psql -c “\du” and sudo -u postgres psql -c “\l”. If authentication fails, inspect the PostgreSQL pg_hba.conf file for your installed major version.
Install and start Solr
Go to a temporary directory.
cd /tmp
Download the Solr 9.9.0 archive from Apache
wget https://archive.apache.org/dist/solr/solr/9.9.0/solr-9.9.0.tgz
Extract only the service installer.
tar xzf solr-9.9.0.tgz solr-9.9.0/bin/install_solr_service.sh --strip-components=2
Install the Solr system service.
bash ./install_solr_service.sh solr-9.9.0.tgz
Check the service.
systemctl status solr --no-pager
Check: Look for active (running).
Manually configure Solr 9.8+ library loading
DSpace ships Solr configurations containing <lib> entries. Solr 9.8+ disables these unless explicitly allowed.
Inspect the current Solr configuration lines.
grep -nE "SOLR_OPTS|SOLR_JETTY_HOST" /etc/default/solr.in.sh
Open the file in Nano.
nano /etc/default/solr.in.sh
Add the bellow lines in the Bottome of the File
SOLR_OPTS="-Dsolr.config.lib.enabled=true"
SOLR_JETTY_HOST="127.0.0.1"
Save with Ctrl+O, Enter, then Ctrl+X. Do not leave two active SOLR_OPTS assignments.
Restart Solr to apply the settings.
systemctl restart solr
Check its running status.
systemctl status solr --no-pager
Confirm the listening address.
ss -ltnp | grep :8983
Check: Ideally 127.0.0.1:8983.
Confirm the HTTP endpoint responds.
curl -I http://127.0.0.1:8983/solr/
Check: An HTTP response indicates Solr is reachable; 200 or an expected redirect is fine.
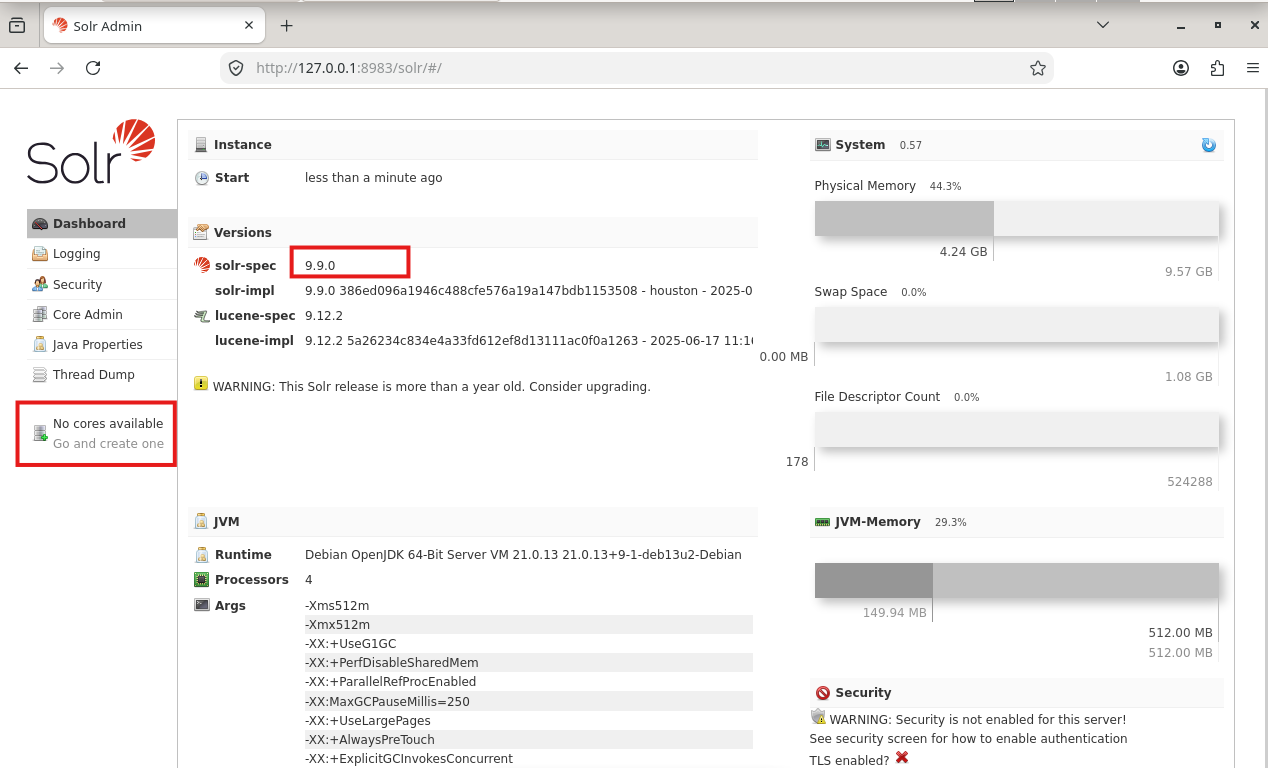
open the solr page in the browser and check it is loading
Build DSpace backend
Download the DSpace 10.1 backend source
Switch to the dspace user.
su - dspace
Move to the source directory.
cd /opt/dspace-src
Clone the matching official DSpace release.
git clone --depth 1 --branch dspace-10.1 https://github.com/DSpace/DSpace.git dspace-10.1
Verify the example configuration exists.
ls -l /opt/dspace-src/dspace-10.1/dspace/config/local.cfg.EXAMPLE
Edit local.cfg manually
You should still be signed in as dspace. This file connects the DSpace backend to the installation path, PostgreSQL, Solr, and UI.
Check whether local.cfg already exists.
ls -l /opt/dspace-src/dspace-10.1/dspace/config/local.cfg
Check: If it exists and contains earlier changes, do not overwrite it.
For a fresh source tree only, copy the example file.
cp /opt/dspace-src/dspace-10.1/dspace/config/local.cfg.EXAMPLE /opt/dspace-src/dspace-10.1/dspace/config/local.cfg
Open local.cfg in Nano.
nano /opt/dspace-src/dspace-10.1/dspace/config/local.cfg
INSIDE NANO: Find each property and replace its existing value. The following are FILE CONTENT, not commands to paste into the terminal:
dspace.dir = /dspace
dspace.name = REPLACE_WITH_YOUR_INSTITUTION_REPOSITRY_NAME
dspace.server.url = http://127.0.0.1:8080/server
dspace.ui.url = http://127.0.0.1:4000
solr.server = http://127.0.0.1:8983/solr
db.url = jdbc:postgresql://127.0.0.1:5432/dspace
db.username = dspace
db.password = REPLACE_WITH_YOUR_ACTUAL_POSTGRESQL_PASSWORD
Use the exact password created in Step 4. Remove conflicting duplicate active properties. Save with Ctrl+O, Enter; exit Ctrl+X.
Restrict permission on this password-containing file.
chmod 600 /opt/dspace-src/dspace-10.1/dspace/config/local.cfg
Verify the settings without printing the password.
grep -E "^(dspace.dir|dspace.name|dspace.server.url|dspace.ui.url|solr.server|db.url|db.username)" /opt/dspace-src/dspace-10.1/dspace/config/local.cfg
Build the backend
Change to the DSpace source root.
cd /opt/dspace-src/dspace-10.1
Build the installer using Maven.
mvn package
Check: This takes time and downloads dependencies. The end should show BUILD SUCCESS.
Move to the generated installer.
cd /opt/dspace-src/dspace-10.1/dspace/target/dspace-installer
For a fresh installation, install DSpace.
ant fresh_install
Check: Only use fresh_install on a new destination. Look for BUILD SUCCESSFUL.
Check the installed files.
ls -l /dspace/bin/dspace /dspace/webapps/server-boot.jar
Inspect the installed runtime configuration.
ls -l /dspace/config/local.cfg
Create DSpace Solr cores
From here, use the root account for service configuration. Run exit to leave the dspace shell.
Return to root
exit
su root
List the DSpace Solr core templates.
ls -la /dspace/solr
See whether Solr already contains any cores.
ls -la /var/solr/data
ONLY FOR A FRESH Solr data directory that does not contain existing DSpace cores:
Copy the DSpace core configuration directories.
cp -a /dspace/solr/. /var/solr/data/
Set ownership to the Solr service user.
chown -R solr:solr /var/solr/data
Restart Solr.
systemctl restart solr
List loaded cores via the Solr API.
curl -s "http://127.0.0.1:8983/solr/admin/cores?action=STATUS&wt=json" | jq ".status | keys"
Check: The returned list should include DSpace cores such as search, statistics and oai.
Run a simple search core query.
curl -s "http://127.0.0.1:8983/solr/search/select?q=*:*&rows=0&wt=json" | jq .response.numFound
Check: A new system typically reports 0 records.
Initialize/update the database schema
Run the DSpace database migration as the app user.
sudo -u dspace /dspace/bin/dspace database migrate
Check database migration status.
sudo -u dspace /dspace/bin/dspace database info
Check: Look for successful migration and no outstanding errors.
Test backend manually before making a service
Open a dedicated terminal or session, then start the backend as dspace.
sudo -u dspace java -jar /dspace/webapps/server-boot.jar
Check: Keep this foreground process running; watch for startup exceptions.
From a SECOND terminal, check the REST API.
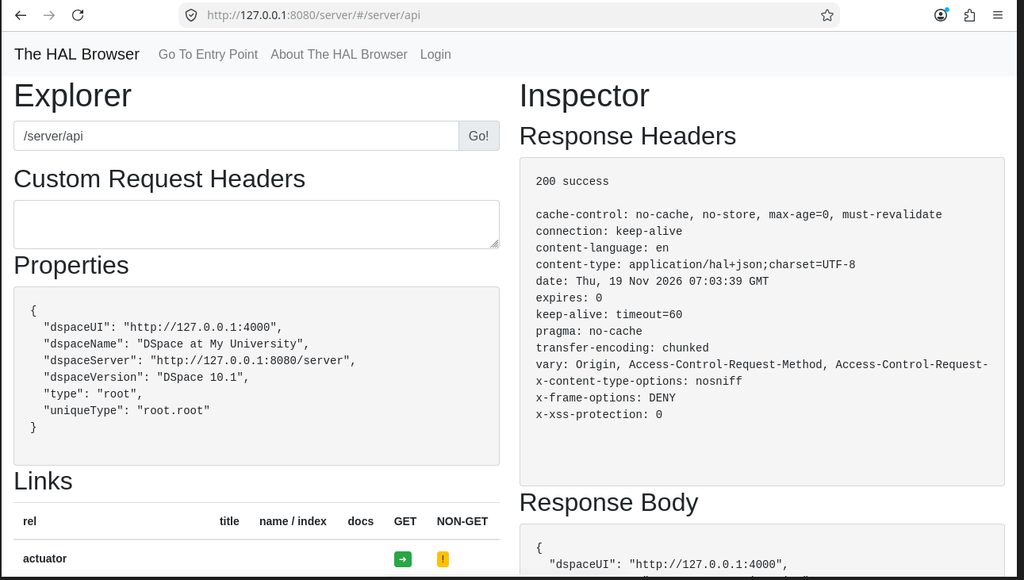
curl -i http://127.0.0.1:8080/server/api
Check: A successful HTTP response and JSON/HAL API data are expected.
Stop the foreground backend using Ctrl+C in the first terminal before configuring the systemd service.
Create a persistent backend service with Nano
Open a new service file.
nano /etc/systemd/system/dspace-backend.service
INSIDE NANO, paste these service-file contents:
[Unit]
Description=DSpace 10.1 REST API
After=network-online.target postgresql.service solr.service
Wants=network-online.target
[Service]
Type=simple
User=dspace
Group=dspace
WorkingDirectory=/dspace
ExecStart=/usr/bin/java -Xms512m -Xmx2048m -Dfile.encoding=UTF-8 -jar /dspace/webapps/server-boot.jar –dspace.dir=/dspace
Restart=on-failure
RestartSec=10
[Install]
WantedBy=multi-user.target
Save using Ctrl+O, Enter and Ctrl+X.
Tell systemd that a new service file exists.
systemctl daemon-reload
Start the backend and make it auto-start.
systemctl enable --now dspace-backend
Check its status.
systemctl status dspace-backend --no-pager
If it fails, inspect recent logs.
journalctl -u dspace-backend -n 60 --no-pager
Create an administrator
Run DSpace administrator creation.
sudo -u dspace /dspace/bin/dspace create-administrator
Check: Follow prompts for email, name, password, and administrator status.
Angular frontend
Install supported Node.js
DSpace 10 uses Angular 20. Choose a supported Node.js release (20.19+, 22.x, or 24.x); use Node 22 for this walkthrough. For third-party repository setup, review the downloaded script before executing it.
Download the NodeSource repository setup script (as root).
curl -fsSL https://deb.nodesource.com/setup_22.x -o /tmp/nodesource_setup.sh
Review the script before executing it.
less /tmp/nodesource_setup.sh
Run the reviewed repository setup script.
bash /tmp/nodesource_setup.sh
Install Node.js.
apt install -y nodejs
Check version.
node --version
Check: Should show v22.x.
Check npm version.
npm --version
Download and build Angular
Switch to the dedicated dspace account.
su - dspace
Open the source directory.
cd /opt/dspace-src
Download matching frontend version 10.1.
git clone --depth 1 --branch dspace-10.1 https://github.com/DSpace/dspace-angular.git dspace-angular-10.1
Change to frontend source folder.
cd /opt/dspace-src/dspace-angular-10.1
Install frontend dependencies.
npm install
Check: Look for completion without fatal errors.
Build the production frontend. (The value highlighted in red should be set to at least 1 GB less than the total RAM available on the PC where DSpace is being installed.)
NODE_OPTIONS="--max-old-space-size=8192" npm run build:prod
Check: The dist folder should be generated.
Confirm the server bundle.
ls -l dist/server/main.js
Copy the built dist directory to deployment location.
cp -a dist /opt/dspace-ui/
Check: The final path must be /opt/dspace-ui/dist/server/main.js.
Create the runtime config folder.
mkdir -p /opt/dspace-ui/config
Create config.prod.yml manually
Open the frontend configuration file.
nano /opt/dspace-ui/config/config.prod.yml
INSIDE NANO: Paste the following YAML. Indentation is important. It matches the localhost test described earlier: (For production installations, the values highlighted in red must be replaced with the actual IP address of the production server on which DSpace is being installed.)
ui:
ssl: false
host: 127.0.0.1
port: 4000
nameSpace: /
baseUrl: http://127.0.0.1:4000
rest:
ssl: false
host: 127.0.0.1
port: 8080
nameSpace: /server
Save: Ctrl+O, Enter, Ctrl+X.
Check that the file exists.
ls -l /opt/dspace-ui/config/config.prod.yml
Test the frontend in the foreground
Move to the deployment directory.
cd /opt/dspace-ui
Start Node manually.
NODE_ENV=production node dist/server/main.js
Check: Keep this open, then open a SECOND terminal to test.
From the second terminal, test the frontend HTTP endpoint.
curl -I http://127.0.0.1:4000/
Check: An HTTP response is expected.
Open a browser inside the Debian VM and visit http://127.0.0.1:4000. If you see an Internal Server Error, examine the terminal logs and ensure Angular REST host and backend URL are identical. Stop foreground Node with Ctrl+C.
Configure the UI systemd service
Exit the dspace shell to return to root. This guide uses systemd for Node; do NOT separately start PM2 on the same port.
Leave the dspace shell.
exit
su root
Open the service file.
nano /etc/systemd/system/dspace-ui.service
INSIDE NANO, paste these service-file contents:
[Unit]
Description=DSpace 10.1 Angular UI
After=network-online.target dspace-backend.service
Wants=network-online.target

[Service]
Type=simple
User=dspace
Group=dspace
WorkingDirectory=/opt/dspace-ui

# Angular runtime environment
Environment="NODE_ENV=production"
Environment="NG_ALLOWED_HOSTS=127.0.0.1"
Environment="DSPACE_APP_CONFIG_PATH=/opt/dspace-ui/config/config.prod.yml"

# Angular UI configuration
Environment="DSPACE_UI_SSL=false"
Environment="DSPACE_UI_HOST=127.0.0.1"
Environment="DSPACE_UI_PORT=4000"
Environment="DSPACE_UI_NAMESPACE=/"
Environment="DSPACE_UI_BASEURL=http://127.0.0.1:4000"

# DSpace REST API configuration
Environment="DSPACE_REST_SSL=false"
Environment="DSPACE_REST_HOST=127.0.0.1"
Environment="DSPACE_REST_PORT=8080"
Environment="DSPACE_REST_NAMESPACE=/server"

# Start Angular application
ExecStart=/usr/bin/node /opt/dspace-ui/dist/server/main.js

Restart=on-failure
RestartSec=10

[Install]
WantedBy=multi-user.target
Save and exit Nano.
Reload service definitions.
systemctl daemon-reload
Enable and start UI.
systemctl enable --now dspace-ui
systemctl restart dspace-uiCheck UI service.
systemctl status dspace-ui --no-pager
Check both application endpoints.
curl -I http://127.0.0.1:4000/
curl -i http://127.0.0.1:8080/server/api
Start Using the Software
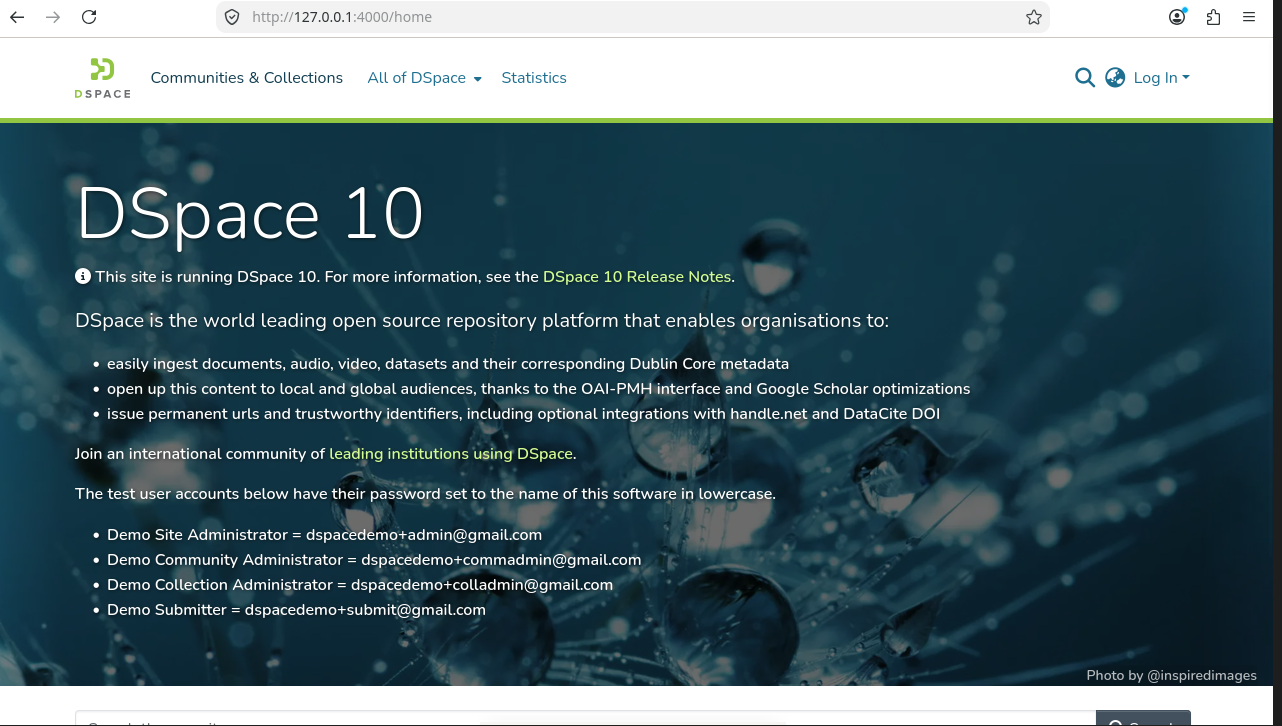
http://127.0.0.1:4000/ – Dspace Interface
http://127.0.0.1:8080/server/#/server/api – HAL Browser Interface
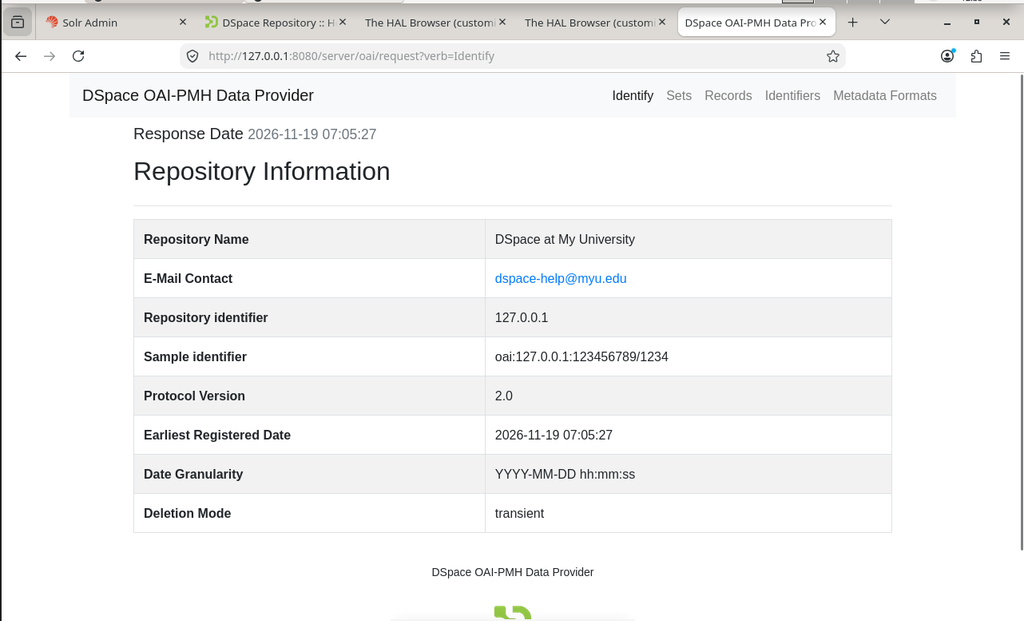
http://127.0.0.1:8080/server/oai/request?verb=Identify – Repository Information Page
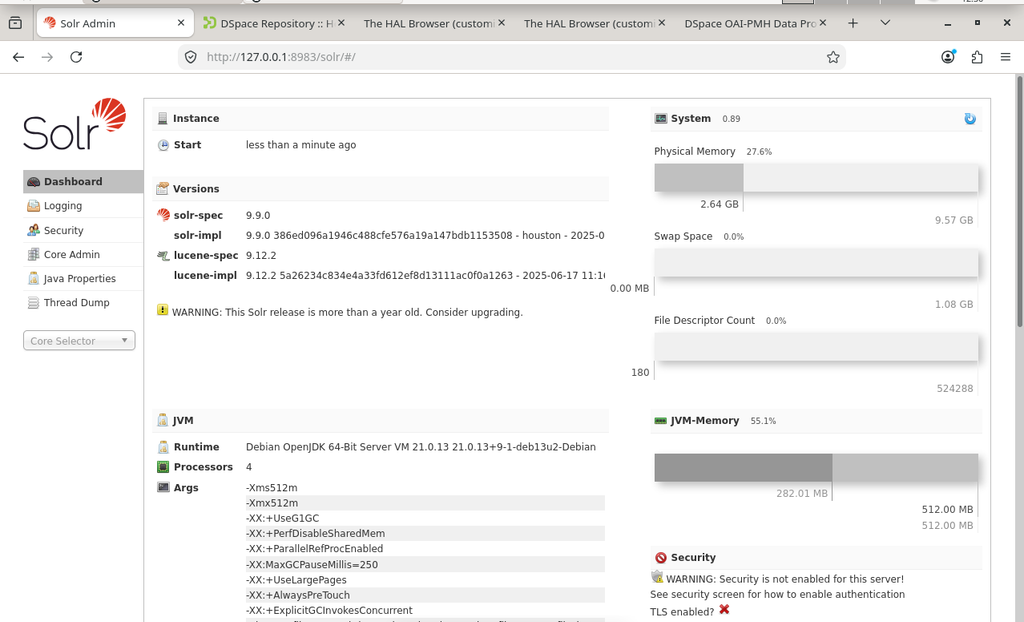
http://127.0.0.1:8983/solr/#/ – Solr Information Page
Useful individual troubleshooting commands
Run these one at a time, depending on the failure:
Check backend logs
journalctl -u dspace-backend -n 80 --no-pager
Check Angular logs
journalctl -u dspace-ui -n 80 --no-pager
Check Solr logs
journalctl -u solr -n 80 --no-pager
Show listening ports
ss -ltnp | grep -E ':4000|:8080|:8983|:5432'
Test DSpace backend API
curl -i http://127.0.0.1:8080/server/api
Test Solr search core
curl -i "http://127.0.0.1:8983/solr/search/select?q=*:*&rows=0&wt=json"
Official references
https://wiki.lyrasis.org/spaces/DSDOC10x/pages/408944708/Installing+DSpace
https://wiki.lyrasis.org/pages/viewpage.action?pageId=458000250
https://github.com/DSpace/DSpace/releases/tag/dspace-10.1
https://github.com/DSpace/dspace-angular/releases/tag/dspace-10.1
This manual is adapted for a fresh Debian 13 VM; it is not a record of a completed installation. Package paths, installed versions, security policy, and public URLs should be confirmed on the actual machine
Disclaimer: This documentation is intended solely for educational and learning purposes. Any use of the procedures described herein in a production environment is entirely at the user’s own risk. Security hardening, system optimization, and other security-related configurations may vary depending on the operating system, server infrastructure, and deployment environment. Such configurations are beyond the scope of this document and must be independently assessed and implemented to ensure the security, stability, and reliability of the production server.